Chapter 6 Audio / Visual
We extensively used Adobe AfterEffects to animate and rotate images/videos across the Magic Planet. If you are not trying to make a video, you may want to use Photoshop or Canvas to edit the dimensions of your media. Note: all dimensions here are for 2K visuals.
6.1 General Parameters:
- Dimensions: 2048x1024 (2:1 ratio for width:height)
- If making something for Science On a Sphere, you might want to make content in 4K (4096x2048)
- Framerate: 29.9—

General Parameters
6.2 Basics of Adobe AfterEffects
A “composition” is kind of the name for a project, but it can be more than that. Basically, it’s a timeline where you assemble (“compose”) different media and effects together. You can have compositions inside of other compositions, which is useful for spherical presentations.
When you create a composition, just drag your media from the folder directly into AfterEffects. Then drag from the media browser into the timeline (w/ the green line).
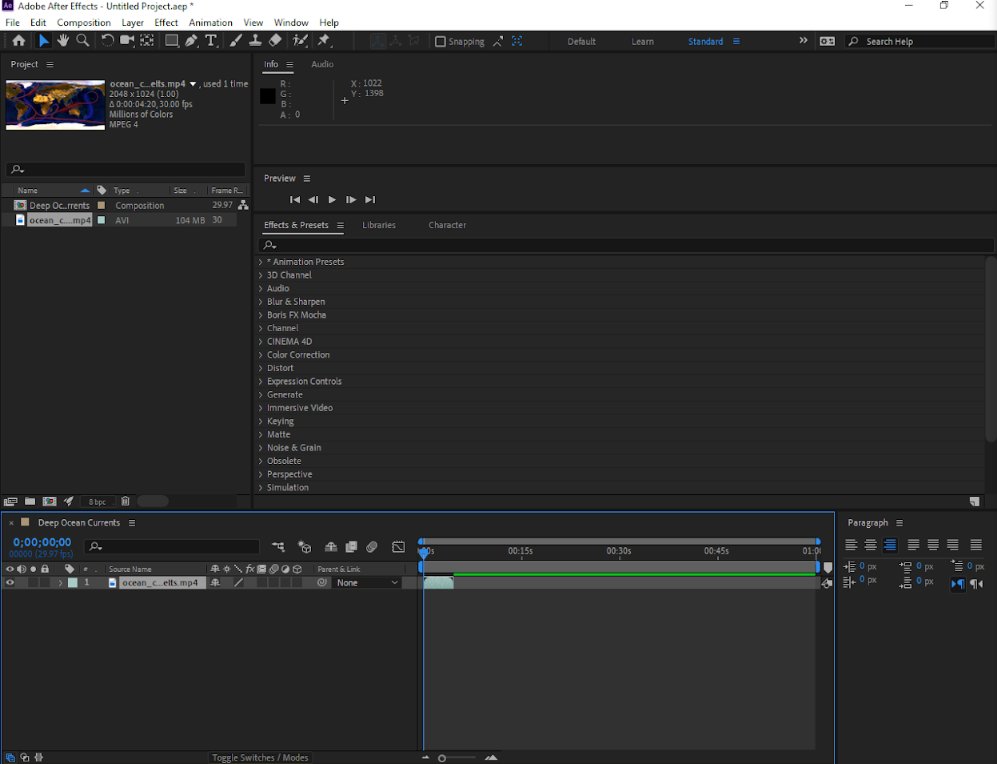
Media in a Composition
Save your composition in the same folder that your media is in.
6.3 Making Your Image/Video Equirectangular
Click on the single layer you have (in the example, it is Ocean currents Base Layer). Select “Precompose”, and choose the second option that appears in the pop-up window:
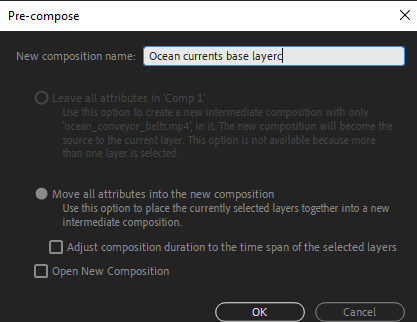
Precompose Pop-Up Window
Open the precomp by double clicking the name. Copy and paste a second layer of the “base layer” layer:

Precomp
Right click on the timeline tab or inside the timeline (not on a layer), and select “composition settings”. Double the width of the composition:
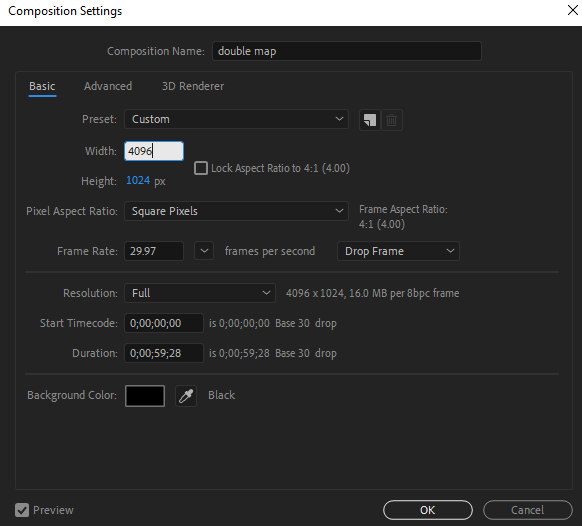
Click on the arrow to the left of your layer name to see basic layer appearance controls (position, size, opacity, etc)


Layer Appearance Controls
Change the x position on one layer to 1024, change the x position on another layer to 3072:
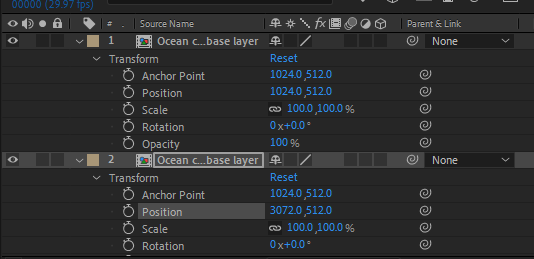
X Positions
Your image/video should now resemble these dimensions:

6.4 Making Your Image/Video Rotate around the Magic Planet
Go back to your outermost composition level. This is probably called “Comp 1,”; it’s the first composition you made. Change the x position of your layer to 0, and make sure your playhead on the timeline is at the very beginning.
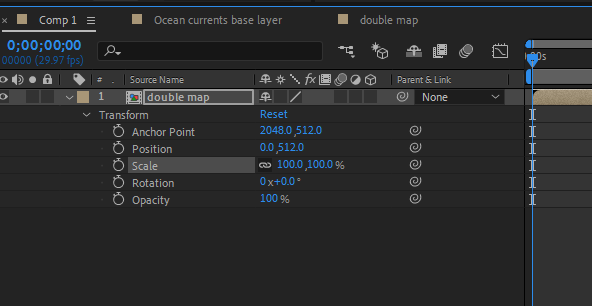
Now click the little clock icon right next to the position control. When you do, that should be lit up, and a diamond should appear to the left and on the timeline.
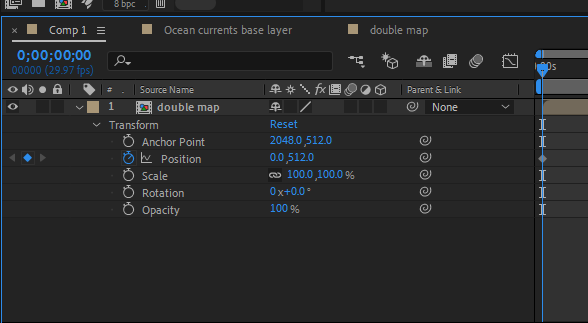
That diamond is a keyframe, which sets some sort of video parameter that can change over time. In this case, it is location. AfterEffects will fill in the change that occurs between two different keyframes–here, it’s movement.
To set your other keyframe, drag the playhead to the end of the timeline and make x=2048 (4096 for 4K). Test the video out. It should animate!

6.5 Previewing Your Visual in Spherical Form
To preview what you’ve done in spherical form, you need to precomp your layer again. With the layer selected, go to Effect>Preview>CC Sphere. You can play around with effect settings (in the upper left) to adjust lighting and shadow.
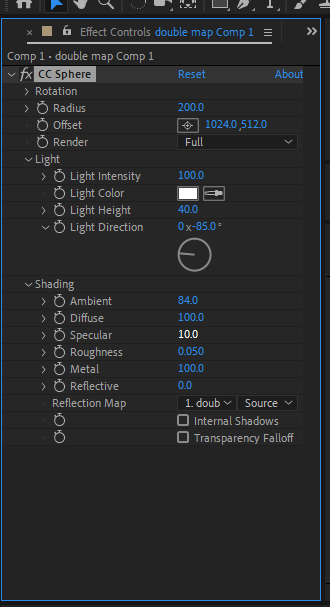
CC Sphere effect settings
Make sure your visual looks good in spherical form before exporting.
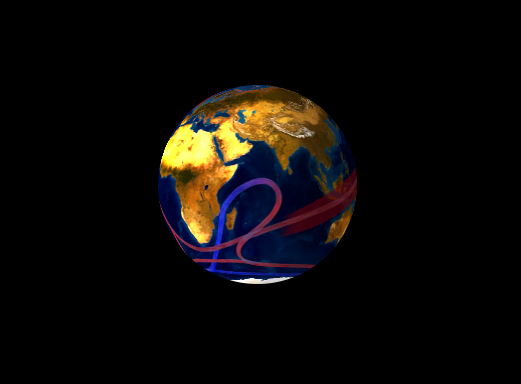
Preview in CC Sphere
6.6 Exporting to the Magic Planet
Go to your last composition that contains the equirectangular version of your visual. Click File>Export>Add to Adobe Media Encoder Queue

Export
Click on the blue preset name (here, it is “equirectangular 2K”), and you should get an “Export Settings” panel.
- Unclick “Export Audio” and make sure the video dimensions are at 2048 x 1024.
- On bitrate settings (in video settings), move the slider to about 20.
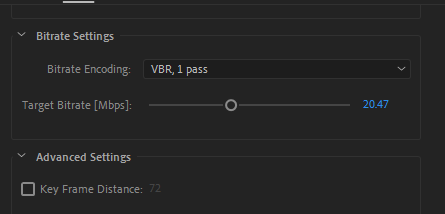
Bitrate Settings
Then to save your preset, click the icon with the arrow pointing down at the top.

Click “Okay”. Back in Adobe Media Encoder, you can change the filename and location of your export by clicking on the link under “Output File.”
Then click the green arrow and your video should export.

Export Button
If you are exporting for the NOAA SOS, you will need to download an external video encoder (such as Handbreak) to convert to MPEG4
6.7 PIPS (Picture in Picture)
For pips, many of the same principles apply, but there’s a couple more steps. In addition to your pictures, you may want to bring in an equirectangular globe image as a background. Once you’ve created your composition, imported your media, and dragged your pips onto the timeline, create a precomp with just those pips.
In that precomp, resize and reposition your pips. Three or four pips on the frame is good. You can click and drag your images on the viewer, but I like to make sure that the y-value is the same for all of them in the numeric controls. [click and drag adjust values] (A good vertical position for Magic Planet is slightly above being centered on the equator.)
After positioning the images, select them all and precomp them. Now, you can take this and go through the same doubling and animation process for the maps.
The only thing different is the background. It should be on your outermost comp level (equirectangular, not the sphere) and below your pip layer. If you want to lighten or darken the background (to make the pips pop out more): Go to Layer>Generate Solid [or whatever it is], select a shade of white/grey/black in the light/dark direction you want the background to go towards, and make this new layer. Drag below your background layer, go to the background’s settings, and lower the opacity to whatever feels right.
6.7.1 NOAA Globe Pips
To make a pip of a NOAA SOS Dataset so it only shows a specific region, first make sure that you’re looping the layer if it’s video. Then with that precomp (or the raw image), use the CC Sphere effect. Change the position and play around with the shading in effects settings.
Then precomp the layer with CC Sphere, copy the image 3 - 4 times (your preference), and resize/reposition. Then you can follow the rest of the steps for normal moving pips.