5.6 Finding the course to steer
We now need to determine the course to steer. This process is similar to that which we used for short crossings.
We set a compass or a pair of dividers to the total distance that we plan to cover in the planned duration of the crossing. We place one point of the dividers at the end of our final tidal drift arrow, then swing them until they reach the line drawn from our start point through the destination:

As for short crossings, we need to avoid the error of drawing this arrow to the destination point. However, with these longer crossings, it is likely that the arrow will end up close to the destination point. If it does not, we may have accounted for too many or too few hours of tidal drift.
We set the dividers to the total distance that we plan to paddle - 5 hours at 3 knots = 15 nautical miles. We then place one point at the end of our final tidal drift arrow and swing the dividers until they meet the planned course line:

We now mark off the point where the divider point meets the course line and draw our course to steer vector:

Constructing the course to steer line. 1: Marking off where the dividers intersect the planned track line. 2: Using the plotter as a ruler to draw a line from the end of the tidal drift arrows to this mark. 3: Finished course to steer line. 4: Course to steer line (red) on schematic chart.
Finally, we can use the plotter to measure the bearing of the course to steer. Once we’ve corrected for magnetic deviation, this is the compass course for us to steer during the crossing.
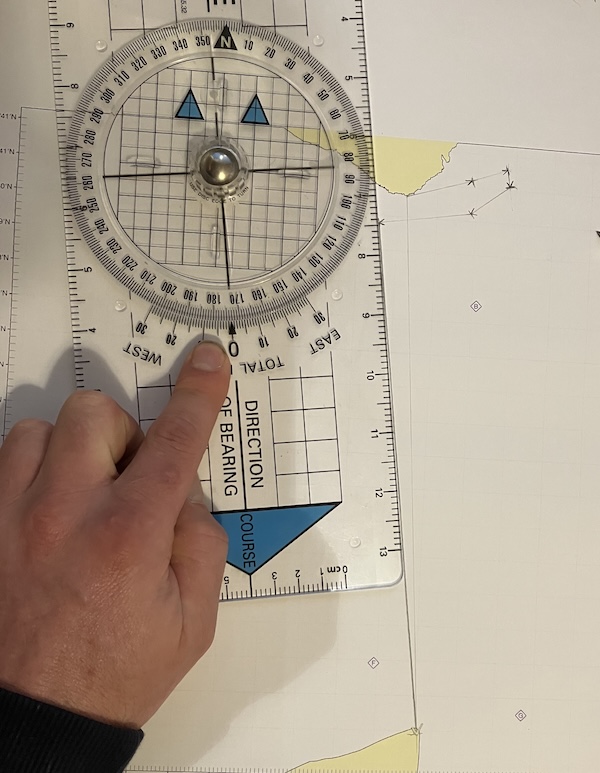
Measuring the course to steer using a plotter. It’s about 173˚.