9.2 Sample Preparation for Room-Temperature TEM
Animal tissue is about several tens to hundreds of micrometers thick; BS2010 covers three approaches:
9.2.1 Sectioning
Sectioning is the cutting of tissues into thin slices.
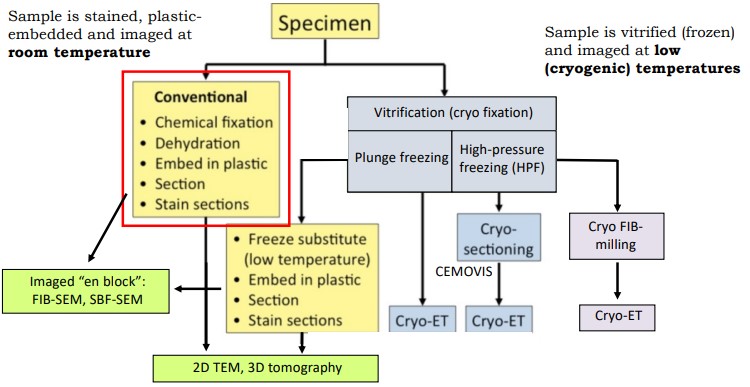
Figure 9.2: Sample Fixations
The above figure outlines some steps needed to be done prior to being visualized with TEM.
9.2.1.1 Fixation
The first step of action would be to fixate the sample to the microscope slide - there are several options:
Glutaraldehyde
This reagent strongly and irreversibly crosslinks proteins by interacting with amino groups. It also has a slow penetration.
Paraformaldehyde
This reagent weakly and reversibly crosslinks proteins by interacting with amino groups. However, it penetrates faster.
Both of the above reagents can be used together.
Osmium Tetroxide
This is a strong oxidizing agent that reacts with unsaturated fatty acids: membrane lipids are crosslinked to each other.
This reagent also penetrates rapidly and gives a contrast to a Biological specimen; it cannot be used for antibody labeling.
However, osmium is extremely dangerous and should only be used in a fume hood. Corn oil can be used to neutralize the reagent.
9.2.1.2 Dehydration, Infiltration, and Embedding
Dehydration is the process of replacing water in a sample with an organic solvent - for instance, ethanol. Gradual dehydration uses ascending concentrations of ethanol.
Infiltration is the process of replacing cell solvent with plastic resin. Gradual infiltration uses increasing ratios of solvent-resin mixtures.
Embedding is the act of polymerizing the resin by “baking” it at 50 to 60 degrees Celsius for two days. Some resins can be polymerized with UV light.
9.2.1.3 Trimming, Sectioning, and Collection

Figure 9.3: Trimming a Sample
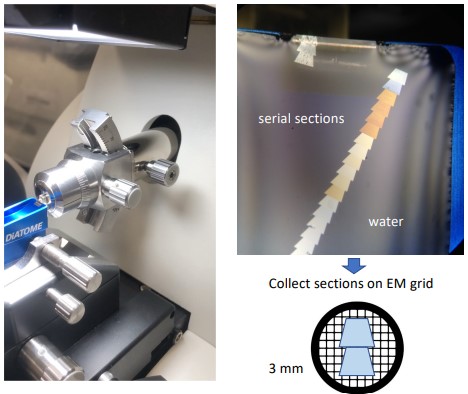
Figure 9.4: Sectioning a Sample
9.2.1.4 Staining
After the (sliced) sample has been placed on an EM grid with the sections facing down, a drop of a staining solution can be used:
Lead Citrate
Lead interacts with osmium and UA, so it is often used with those three stains. Together, these three compounds stain a variety of cellular components, but it also requires CO2-free conditions.
Lead is super toxic and must be used at the right pH.
Uranyl Acetate (i.e., UA)
Uranyl ions bind to the carboxyl groups of proteins and the phosphate backbone of nucleic acids. These ions also enhance the contrast of membranes, nucleic acids, and proteins.
UA is also radioactive and light sensitive.
UA is typically applied prior to the sample being dehydrated.
9.2.2 Other Sample Preparation Techniques for a Conventional TEM
Like mentioned previously, TEM is limited by sample thickness (i.e., the sample should be no more than 80 nm thick for 2D TEM and 300 nm for 3D TEM).
Samples in conventional TEM are chemically fixed, dehydrated, and embedded in an inert polymer.
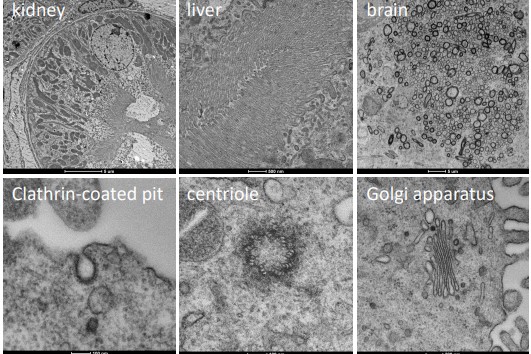
To visualize macromolecules inside cells, the sample needs to be stained with electron-rich heavy metals.
All Biological samples are also radiation-sensitive.
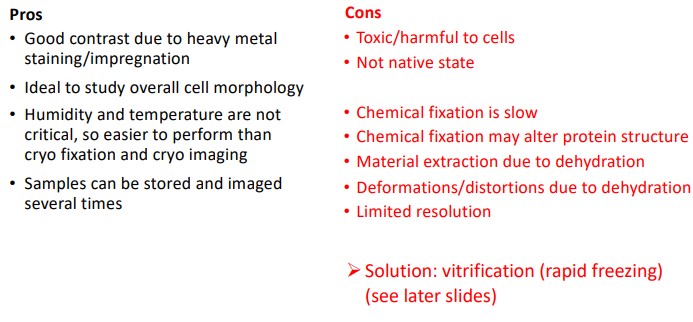
Figure 9.6: Pros and Cons of Using Conventional Sample Preparation for TEM
The above figure shows some pros and cons as it pertains to using conventional sample preparation techniques for TEM.
9.2.3 Cryo-Fixation
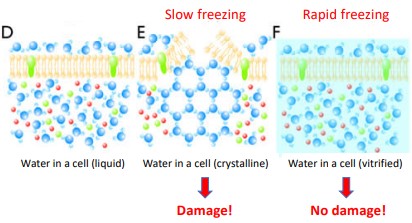
Figure 9.7: Cryo-Fixation
In this method, cells are rapidly frozen in their natural environment to preserve their physiological states.
Vitrification requires rapid-freezing (and high pressure) to prevent ice crystals from forming. Several techniques - such as plunge freezing and high-pressure freezing (i.e., HPF) can be used.
9.2.3.1 Plunge Freezing
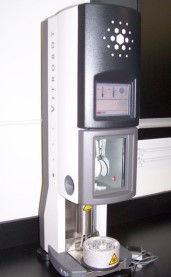
Figure 9.8: A Plunge Freezer
This is a technique that rapidly freezes samples at low temperatures (e.g., -180 degrees Celsius) in liquid ethane or propane. Samples are rapidly dipped into the aforementioned liquids:
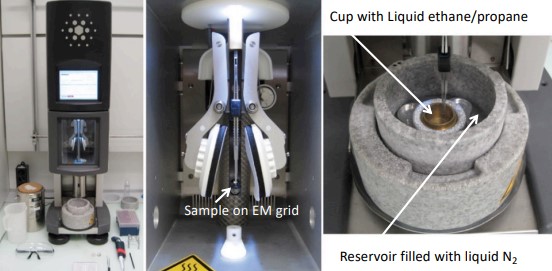
Figure 9.9: A Typical Plunge Freezing Setup
This is also the preferred method for freezing purified proteins, protein complexes, viruses for single particle cryoEM, and small cells (e.g., bacteria, yeast, etc).
Plunge freezing can accomodate up to 2 - 5 μm thick samples.
9.2.3.2 High Pressure Freezing (i.e., HPF)
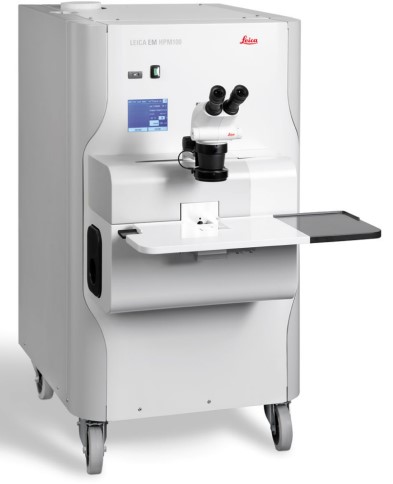
Figure 9.10: A HPF Machine
This is the rapid freezing of a sample at low temperatures (i.e., -180 degrees Celsius) that also prevents ice crystals from forming.
This is the method of choice for freezing mammalian tissues and cells as it can accomodate sample thicknesses up to 200 μm.
9.2.3.3 Dehydration and Embedding Using Freeze-Substitution
There are a few pointers to note:
- The frozen sample is slowly brought to room temperature over the course of a few days via a step gradient.
- Organic solvents are typically supplemented with UA.
- Gradually replacing water with organic solvents at low temperatures prevent cellular structures from shrinking.
- After dehydration, the sample is embedded in an inert material that can be polymerized with UV light.
- The above point allows the specimen to be sliced into various thin sections to be imaged by TEM.